Calendar
How to add and manage an event
Learn how to configure Virex for your project. Covers build settings, environment variables, and deployment options.
Add an event
-
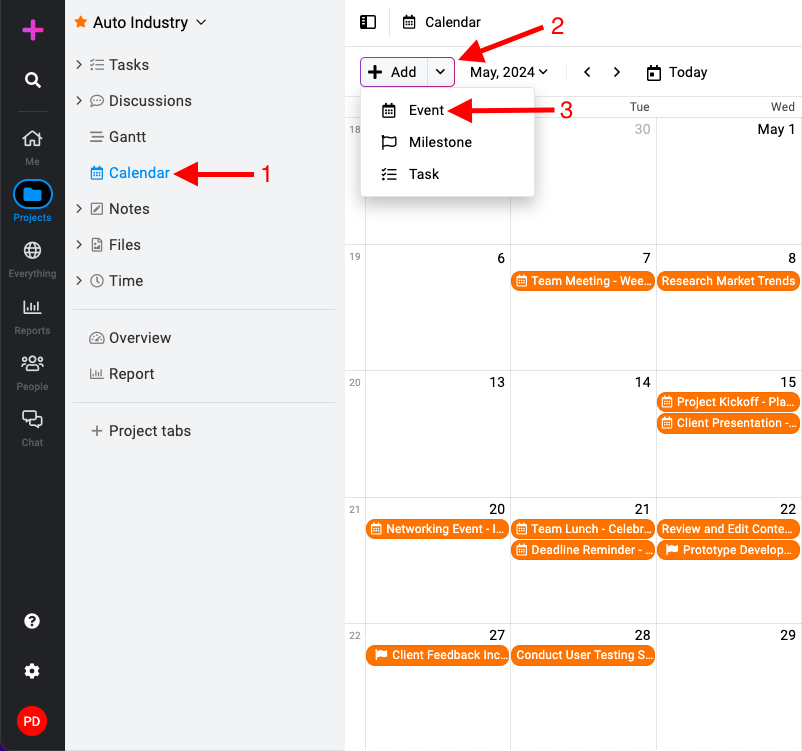
Navigate to the calendar section: Go to the specific project in ProofHub where you want to create the event, click on the “Add” button, and select “Event“.
-
Fill event details:

-
Title: Enter a title for your event.
-
Description: Add any additional details or context for the event.
-
Attendees: Choose attendees from the list of project members.
-
All day event: Check this box if the event spans the entire day.
-
If it’s an all-day event, you don’t need to specify a specific start and end time separately.
-
If the event occurs at a specific time:
-
Uncheck the “All day event” box.
-
Specify the start and end time for the event.
-
-
-
Repeat: If the event repeats, select the desired frequency (daily, weekly, monthly, yearly).
-
Timezone: Choose the appropriate timezone for the event.
-
Reminder: Set a reminder to notify attendees before the event starts.
-
Mark as private: Check the “Mark as private” option if you need to restrict the visibility of the event to selected attendees only.
-
-
Save the event: Click on the “Add” button and save the event.
Edit an event
-
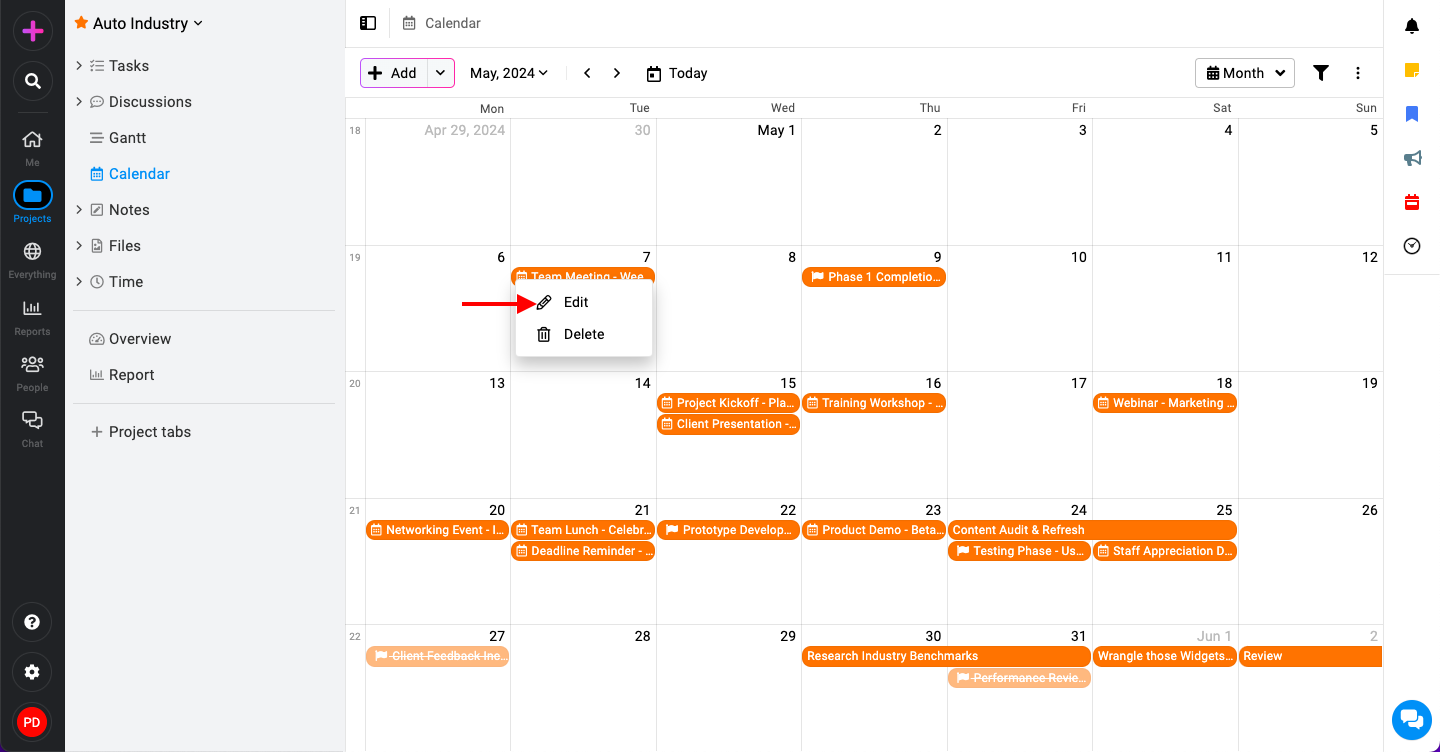
Editing event: Right-click on the event you want to edit.
-
Select ‘Edit‘ from the context menu that appears.
-
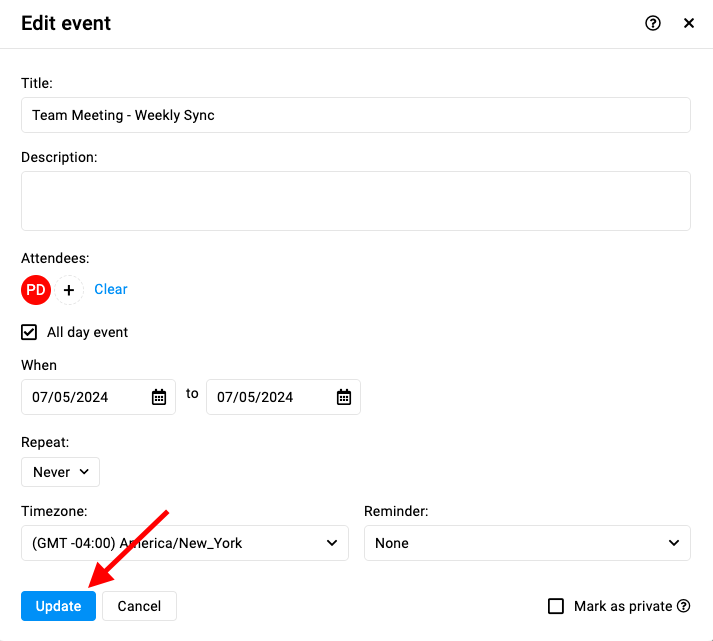
In the edit window, modify the item’s details (e.g., title, date, time, description).
-
Click ‘Update‘ to apply the changes.
-
Delete an event
-
Deleting event: Right-click on the event you wish to delete.

-
Select ‘Delete‘ from the context menu.
-
Confirm the deletion by clicking ‘Yes‘ in the confirmation window.

-